This page will show the work that I am doing every week over my last semester of College for my Game Design capstone project. I am currently the producer, lead programmer, and designer for the game. So there will be quite the variety of work put into this page. It could range from planning out what my team is going to do before launch to the creation of a tool that will help with the workflows of my teammates.
We are trying to launch our game after five weeks of development this semester. Due to this fact blocking out those first five weeks of the semester with reasonable
goals that cover the main content goals for release was very important. The content we need to get to a satisfactory level is as follows:
- Journal implemented
- 12 Upgrades implemented
- 8 new sigils implemented
- Finalized art for 30 crystals
- Controller input implemented
- Journal art finished
- 2 new journal entries
- All synergies finished
- Crystal supercharging system finished
- All Crystal abilities have sound effects implemented
- All UI elements have sound effects implemented
- Adaptive music implemented in game
In order to plan out the work on or implementation of all these systems and assets a weekly plan for the semester was required.
We have six programmers including myself, one artist, one narrative designer, and three sound designers. This means that we have
the hours needed to complete all the above requirements to a satisfactory level. One of my tasks this week was making sure that
everyone got tasks that covered these issues, but not so many that they would be overworked.
Link to semester plan
Another task I had this week was the implementation of a synergy. I had previously set up the system for cluster slots recognizing when what
family types they are connected to and calling a function on hit or on fire that will trigger those synergies. So I did not have to worry much
about the underlying systems that allow synergies to work. The description of this synergy is that whenever the player has crystals with active
summoning and piercing synergies which have made five hits the player will become invincible for 1 second.
To solve this problem I made use of coroutines to wait that predetermined time to toggle a boolean which allowed the player to be damaged.
While the player was in the state of invincibility I used a previously implemented function to change the color of Nilvor.
While I was working on the above synergy I became frustrated while testing, since we have so many crystals,
the chances of getting the combination of families on the crystals you have in your sigil to get the synergy
you want is low. I decided to remedy this by creating a tool that allows you to spawn a crystal of your choice.
This uses the system for crystal spawning that I had already created.
It takes the crystal abilities that are available in the game, then puts them in a popup list. The user is
able to select an index on that list and it is passed into the custom spawn crystal function. It then takes
the player position and spawns a crystal using previously implemented techniques. Overall this tool is going
to be extremely helpful for the implementation of new synergies and other systems in the game.
The other task I had to do for this week was setting up a bank account for my teams LLC. I went to IU Credit Union and got it set up the bank account. We need the bank account so that if we earn money from the game through steam we have somewhere where it can go.
This week was much more lowkey in terms of the amount of work I got done because I got pretty sick. I only ended up getting the system for unlocking sigils completed.
The first step in the process was learning the systems that Jonah had created, since the sigil unlock system was heavily reliant on them. The first system was the UI
container system that he had created. In order to change the menu you just had to call a change menu function and it would enable all the children of that object.
I also had to add a list into the SaveData class to hold the names of the unlocked sigils.
I also had to add in some helper functions to add in the sprites of the sigils for the player to see and check whether they had been unlocked or not. I also added in
the functionality to unlock all the sigils for testing. The last thing I added was the ability to unlock new default sigils through killing the boss.
The next thing I did was partition the different sigils into different "pages". This way the main difference between the different sigils is much more obvious.
This week I was focused much more on adding Juice into the game. One of the first things I did for the week was making a system to animate some bones assets we already had to fall and bounce a few times. I also had to add them into the object pooling system I had already set up so they could be reused for every enemy kill. The final product of the bones spawning is the to left.
To the left is a close up of the bone bouncing animation. I made it so you could put in any amount of gameobjects with a transform and a sprite renderer.
During the creation of the pooled objects the animation is initialized setting up the Bone class I created which holds the specific speeds and bounces for each "Bone".
The bones increase in speed as they fall, then when they hit the ground position that was passed in they enter a state of bouncing. When they are initially put into that state
their speed is scrubbed by the bounciness variable that is passed in and the "y" value of their position starts increasing until their speed hits zero. They are then removed from
the bouncing state. This continues until the bone hits the max amount of bounces passed into the parent script.
Example inputs:
This gif is showing the screen shake that I added on enemy hit. Two of the tasks I had to add juice to the game was adding some delay on the follow of the camera and the ability to add screen shake in. I accomplished both by installing the Cinemachine plugin and adding a follow camera. The camera had damping on the x and y axis. I also added a in noise using the 6D Shake that came with the plugin. I related it to a boolean in the Gamemanager that allowed camera shake or not, so we can later add it into the settings. The only place I have it added in currently is when the player takes damage.
I also was tasked with updating the smokes speed and color depending on what you are doing in the diegetic UI. If you level up and are placing buffs the color of the smoke is pink. If you pick up
a crystal the smoke is cyan.
Below is the original smoke and the smoke spawned when you pick up a crystal (The quality is not super high, but the speed difference is obvious):
The last thing I had to do for the week was update the color of the experience. Before this week it was white and was normally ignored by the players who had never played before.
With the new change it is bright pink, the same color as the experience bar. We are hoping that this will make the experience more enticing.
Below is the original experience next to the new experience:
This week I had the task of adding in drops to the destructible objects we already have in the game. The drops we are currently adding in are the Currency and Health drops. I was also able to get in around 4 - 5 merge request reviews in so that our main branch of the project was able to catch up a bit to how much developement had been finished.
In terms of the task I finished this week I added in the functionality for pooling two new object, they were a currency prefab and a health drop prefab. They both had specific functionalities,
but I was able to wrap them up into one script.
This script allows the developer to set the InGameDrop type which changes the functionality of the object once it is picked up. I noticed that the only real difference between the two prefabs
was the sprite used on the sprite renderer and the type of the InGameDrop. Both these variables could be changed at the time the pooled object is accessed.
I spent a bit more time consolidating the two prefabs into one prefab. Previously I had the setup you can see below and to the left, but afterwards I had to setup you can see below and to the left.
Then afterwards I had the following solution.
This change made it so that at the very least the Heap would be slightly smaller with less functions, but overall I think it is nice to have objects which have similar functionalities
in the same place. If there is an issue with the system I have set up in the future, fixing it will be easier.
The last things I added were damage indicators. There was no indication that anything was happening when you hit the crystal deposits, so I went into photoshop and made a quick
slash indicator. I added this into the GameManager pooling system as you can see above. When the Destructible object is now damaged the damage indicator is enabled and moved to
the position of the destructible object.
I added booleans so the randomization of the rotation and position offset could be disabled or enabled. I also added in a value that allowed the user to increase or decrease
the max distance of the offset. I also realized that it would probably be nice to have the color of the damage indicator be the same as the class that damaged the destructible.
I did this by passing in the class of the object into the OnHit function, that way when the damage indicator is enabled the color will be appropriate.
Apologies for the quality of the gifs to the left. It is hard to tell that the damage indicators are there at all with the graininess.
Role Analysis is a seperate assignement that is worked on in parrallel to the making of our games. I was a part of the programmer role analysis. For this past month
all the programmers in my class were working on some sort of movement based programming project. It could be a prototype, toy, or some miscellaneous thing that
the programmers were able to think up.
For my role analysis I decided I wanted to make a player character that had actual good feeling movement and animations. I took almost all of my animations from Mixamo and
spent a lot of my time setting up the Unity animator state machine.
Animator Base Layer
Animator Moving Substate
Animator Idle Substate
Animator Dancing Substate
The way I started this project was not with the animator but with the player script. I started by adding in movement variables.
There variables allow the user to precisely fine tune the acceleration of the player in different states as well as the max speed for different states.
In order to help keep track of the different states I created a overarching PlayerState enum followed by some substate enums.
Every frame I am updating the input vector through Unity's input system and asking for the "Horizontal" input axis.
I am then calling UpdateAverage which I will get into in the next section, then UpdatePlayerState and finally UpdateAnimator.
UpdatePlayerState
UpdatePlayerState is just a bunch of logic that updates the global state variable I have in the Player class.
The first main check is whether the player is idle. If the player is not inputting any vertical or horizontal
inputs and not dancing, then the player is placed in the idle state. If the player is not inputting in any direction
and is in the dancing state, then they stay in the dancing state.
If the player is making some sort of input the move state is updated.
The first check that I am going to go over is for the sprint toggle. If the player is not running, dashing, or sliding
and they press down the left shift key then the player will enter a move state of running. If they are already in the
move state of running and they press the left shift key down, then they are put into a move state of walking.
The next three checks are to see if the player needs to be put into the walk move state, if the player is running and has
pressed the left control key down and needs to be put into the slide state, and if the player is in the slide state and has slowed
down an extreme amount putting them in the walk move state. The last line is setting the overall player state to moving.
UpdateAnimator
The UpdateAnimator function is just taking the states we set previously and updating the variables in the animator
respectively. The first check in the animator is to see if the player is idle. If the player is idle, then an idle timer starts.
This timer is used to switch between the short idle and long idle animations.
The next section is setting all the boolean for the overarching player state.
The next if statement checks whether the player is idle. If they are idle then the LongIdle boolean is set depending
on how large the timeIdle float is. If it is greater than 2 seconds then the LongIdle boolean is set to true. If the player
isn't idle then the player is checked to see if they are going Fast or in other words faster than the max walking speed, if the y
value of their input value is negative, updating the run blend (explained later on), or if they are in the move state of sliding.
UpdateAverage
As I said before I would get to the UpdateAverage function, I will go over the functionality of the function as well
as the reason for its use in this section. As you can see in the function below, if the Queue is at the max amount
of indices then the first member is dequeued and a new inputVector is enqueued in. Afterwards, the x and y inputs are
averaged over the amount of indices. Since the input is averaged every frame, the average will be over the predetermined
amount of frames averaged.
The need for this average came about because of the blend tree you can see to the left. It takes in three animations.
In this instance it is taking in a run left, run right, and run forwards. If the Run Blend variable is at -1 then the
blend tree is totally in the run left animation and for 1 it is in the run right animation.
The problem I ran into was that with just taking the horizontal axis from Unity's input system the animation was snapping way too much. Below and to the left you are able
to see the issue I was facing. When the inputs were not averaged over time the blend value was pretty much going straight from
1 to -1. I tried quite a few different math solutions, but the simplest and most effective one I stumbled across was the averaging
of inputs over time. This second gif you can see below and to the right is taking the average of the players input over 20 frames. It is still
fairly snappy, but it does not feel as jarring as the first one.
To the left I put a gif where the averaging is done over 100 frames. I am not sure how well it translates over a gif, but
when you are the one inputting it feels like the player is lagging pretty far behind where they should be with this large of an
average.
Dancing?
You may have been noticing the dancing references throughout the project so far and wondered what they were doing there.
Do not worry, they were not a mistake. Near the start of this project I got distracted with the idea of adding emotes
into this prototype. This distraction led me to recreate a bare bones version of the Fortnite emote wheel.
This system started to turn my basic little prototype into a bit more of a game so I set up a GenericManager class to act as
my singleton for the project. It held reference to the dance menu, the player, as well as getting the inputs that were not related
directly to player movement.
If the player holds down the B key then the emote wheel will activate and if they let go the emote wheel will deactivate.
This is useful, because it allows me to use the OnDisable function to see if the players mouse was hovering a dance option
before the dance menu was disabled. If the player was hovering a dance option, then all the dance booleans are set to false,'
the main player state is set to dancing, and the current dance is updated in the Generic Manager.
To the left you can see the dance substate in the animator. This substate is accessible from any state when the ResetDance
boolean is set to true in the animator. This is done by updating the PlayerState as you saw in the above images. When the
player state is updated to Dancing, then the UpdateDance coroutine is started. In the UpdateDance coroutine the ResetDance
boolean is set to ture, the boolean of the dances name is set to true. Finally the ResetDance boolean is set to false at the
end of the frame so the dance animation is not broken by the entry back into the dance substate through the any state.
I wanted to get a bit more stuff done for this role analysis, but I had quite a few setbacks during the month that didn't allow
me to get as much work in as I normally would. The three main features I wanted to put in were sliding, some sort of gun aiming and shooting,
and a time slowing technique like in super hot (although I don't know if it would be as effective outside of VR).
I hope you enjoyed this months role analysis.
Revive upgrade
Grayson's controller input placing a buff, no obvious changes are made so this is just context.
Player using all five dashes in a row
Max experience upgrade
Max level recovery, 5 health regained
Max Greed upgrade for currency
For this week I implemented twelve new permanent upgrades for my issue this week. It was a lot more gameplay programming than normal with some
small amounts of systems programming where I made some changes to the Upgrade class to allow for more in depth upgrades.
The previous system implemented by Jonah only allowed for increasing of float variables by a percentage passed in through the instantiated
upgrade. I made a change that allowed for decreasing percentages as well as outright setting of variables. This second ability was used for
this first upgrade I implemented this week "revive".
Below I have the changes I made to the Upgrade class.
The most common upgrade has overload variables that can be added in to customize whether it is a percentage and or it has a custom ending.
The variables are updated in the player script and the main functionality using fields and looping through the upgrade list was already premade by Jonah.
The only thing I had to add in was the checks against the new overload variables I added in. I also made some checks in the UI manager
for changing the text you see when buying the upgrade so they are legible. The checks are very similar to the ones below, the only difference is
how the strings for the text are created.
Implementing changes when upgrades are bought
Now, moving into the implementation of the upgrades. As mentioned previously the first new upgrade I implemented was the revive upgrade. I used
the new functionality of being able to set a variable to a specific value. If the ugprade was bought it would set the value of _extraLife to 1.0f.
This could then be used when the player died.
As seen above I checked whether _extraLife was greater than or equal to 1.0f. If it was then I subtracted 1 from _extraLife, set Nilvor's health back
to the _maxHealth and used the pooled damage text object to signify that Nilvor had indeed revived.
The next three upgrades I implemented were very similar. They were increases on buff potency. These were another case of setting a value specifically
rather than increasing it by a percnetage. These values are then directly added into the buff value picked. I worked with Justin earlier in the week
to implement the new system of upgrades, so after merging that branch into my own it was easy to implement this upgrade into gameplay.
The next two upgrades I implemented were the successive dash buff and the dash cooldown reduction buff.
This took a bit more time than the above systems since I had to add in the functionality for Nilvor dashing. I had never implemented
a dashing mechanic before so it was a fun little challenge. The first approach I took was adding in the input vector multiplied by the dash
distance in the frame of "dash input", but this was very jarring.
Instead, the solution I fell upon was having a base dash multiplier that is added every frame to the movement. Normally when the player hasn't
requested to dash the value will stay at 1.0f. If the player has requested to dash then the dash multiplier will be increased to the value set
in the inspector. Subsequently a coroutine will start to reset the dash multiplier to 1.0f. If the player has dashed more than the amount
of dashes they have upgraded to then they will be forced to wait until they can dash again.
The next upgrade I implemented was an experience multiplier, this increased the max drops of experience from enemies. I did this by
adding in a for loop where the experience is dropped when an enemy is killed. I did not play at all with the chance of drop (this could be a seperate upgrade).
For this I again used the new upgrade that only sets a variable rather than changing it by a percentage.
The next upgrade I implemented was recovery. Every five seconds the player will be healed by the level of the upgrade. So if the upgrade
is at level zero, then the player health would be incremented by zero every five seconds. If the upgrade is at level five, then the player health would
be incremented by five every five seconds. On Player start I InvokeRepeating on the HealUpgrade() function.
The next upgrade I implemented was Greed. This implementation was very similar to the experience multiplier implementation. In the Destructible.cs
script when the player destroys a destructible I added in a for loop that takes in the _greed variable from the player. This variable is set specifically
from the upgrade script, not a variable changed by a percentage.
The next few upgrades I implemented were for increasing the potency of synergies. The first one was the common family synergy. This one I used
specific setting of values, but turned it into a percentage when the synergy was applied.
The next two are implemented on Billy's branch but still need to be merged in. I just added to the amount connected for the time being.
I implemented the Piercing Summon upgrade which increased the amount of projectiles which split off by the level you have bought.
I just added the value of the upgrade to the for loop that creates the new projectiles.
The last upgrade I implemented was piercing summon. This lowered the amount of hits needed to go invincible by the level you have upgraded it to.
Start of narrative portion of Tutorial
In the tutorial outline that Juliana made it said that the text would be put on a black screen and the player would have to read it, but I decided
that would be boring and would have to be changed later. I decided to start with a version we would be happy to release with in the coming weeks.
I created the FirstRunSystem class which is created whenever you start a game. It takes in a boolean checking if the developer wants to skip the
tutorial and whether it is the players first run. If it is not the players first run then the intro narrative cutscene and following tutorial will
not occur.
In order to lower the amount of conflicts in Map1 I added the lines into the class directly. If any of our designers want access to this for changes
I can easily update it to be visible in the inspector, otherwise for the time being since developement is moving fairly fast I am keeping it in the class
directly.
As may have been made obvious from the calls to GameManager this class is very intrusive on the rest of the game. I tried to make its footprint as small
as possible, but it still touched/was accessed in four other classes.
It was used in GameManager to hold references for other classes as well as instantiation of the initial FirstRunSystem class.
The gamestate reference was added into the player for both the movement and the decrementation of health. While the player is in the tutorial, the health
used is the tutorial health which hits zero at around the point of the text ending.
The gamestate was used in both the enemy and the enemy spawner in order to start spawning for the spawner and allow movement for the enemies.
I created the text spawning using the previously created damage text. I did make some slight changes. I updated the scaling of the child so there was not the
weird offset in the text that you can see to the left. I also made it so the background color also fades out. That way there was not a black version of the text
left behind for no reason.
First Run System Prefab
Showing the WASD Keybinds
Bindings shown change when input device changes
This week I finished the implementation of the tutorial. I spent a lot of time trying to make a modular system that takes in the new
Unity input system's bindings and applies them to the tutorial instructions. I was not able to get that completely done because I did not
realize we were using two different action bindings, UI and Player. This means that some of the binding names are different.
I used unity's event system in order to update the instructions that the player was receiving.
In the UIManager I added the UpdateInstructions function as a subscriber to the event I created in the First Run System. That way I could
easily send a string with the new instructions and a list of sprites that needed to be displayed on screen.
The main bulk of the logic for this tutorial is done in the Tutorial Logic Ienumerator. Every call it queries the current step then puts that through
a switch case. In that switch case it checks if the prerequesites for finishing the current step are complete. If they are, then the step is finished and
the event is invoked for the new step information to be displayed.
There are a lot of different steps I had to create prerequesites for, killing the first enemy, killing the first first mini boss, seeing whether the player had
selected a buff or crystal, and more. This meant that the First Run System required a lot of GameManager references so it could see other systems in the game.
I also had to add a few custom functions in different scripts, for example I added a TutorialSpawn into the spawner to allow for a single spawn of an enemy and a mini boss.
I also added a TutorialStart function into the GameManager which allows to check whether the player is on the First Run and/or if the developer wants to skip
the tutorial.
Overall I think the tutorial was pretty successful. I still need to add one more narrative section in where Nilvor picks up a perfume bottle and finish the implementation
of the modular system for showing the binds of the player. Other than those two remaining portions this system is pretty well done and is extremely functional at the moment.
Confirmation of build submission
Remaining recommended features
Library used for Steamworks API implementation
Achievements put into the Steamworks site
This week I added in the library needed for Steam achievements, the start of that implementation, helping The Krilling with the implementation of their
new home menu, and submitting our newest build to Steam for review.
Build Submission
In order to submit our newest build to Steam I had to finish a few tasks. The first was setting up the pricing for the package. We are releasing at
USD 4.99 so that one was easy enough. I started finding the conversion rates for the rest of the countries, but I noticed Steamworks had a tool for automatic
input of the values. I ended up using that for all the currencies other than USD.
After I submitted the pricing for Conquering Ciros I had to submit a build throught he Steampipe page.
Our build was less that 2GB so I was able to just submit a zip folder straight to the website, the next thing I had to do was set up the launch options.
It was a little bit confusing, but after finding a bit of information about it on the internet I found that you just had to put the path to
the executable from the root directory in the zip file. That is seen in the below image.
After that was completed I submitted the build for review and am still waiting to see whether it was approved or not. We still have a lot of bug fixes
and polish to complete, but the build is in an alright enough state for release.
Steam Achivements
In order to follow the Steam API I followed two tutorials by AuroDev. The first was one about installing a library for the steam api
and another for using the library for achivements
As recommended in the video I installed the Facepunch.Steamworks release from GitHub and added it to the Unity project. I then created a new GameObject for
initializing the Steamworks API.
Next, using some pre-made art by Delilah I made some base achievements for the player to get. I then moved the assets into photoshop and added some glow in the background
for the achieved logos and grayed the assets out for the unachieved assets.
Public Demo
Function to check and unlock achievements
One of many helper functions for similar achievments
This week I worked to fix the review we received from the previous build submission. The first thing I did was communicate to Delilah that all the different
capsule images needed to have the games name in it. Our store page was approved, but apparently that was overlooked by the store page reviewer. We also got some feedback
on the state of steam integration. It is best practice to have the game pause when the player opens up the steam overlay. Since I already had a branch with Facepunch.Steamworks
on it for the achievements I started that implementation on there. The other things I wanted to add in, since there was more time, were the "all the upgrades branch", Billy's "enemy spawning" branches, and Billy's "synergy" branches.
Reviews
This week I did a lot of reviews to get some of our past work into the main developement branch for the build submission.
There were quite a few conflicts with map1 while reviewing, but I was able to get the two branches by Billy in and remove all the conflicts in my
"all the upgrades" branch so I could get it ready for review.
Those reviews and fixing the issues in the "all the upgrades" took a lot of time, but they allowed for all the mainn promises of our game to be fulfilled.
We now have longterm progression with the upgrades, synergies for all the different families, and consistent enemy spawning.
The rest of the week I spent working on integrating the achievements I made last week. This touched a lot of systems and I had to decided at some points whether or
I wanted an achievement to be checked for consistently or only at the end of a run.
I ended up putting a lot of checks in the GameManager. This is because a lot of the systems that deserve achievements end up sending their updates through the GameManager at some
point. There were a lot more helper functions and checks, but I will only put a few so I can get the main gist of what I did. It was not very hard to get all the checks in since
I worked on all the systems in the game, the most time intensive part was testing to make sure they all worked properly.
Indie Giving
GDC Sign
GDC WEEK
Monday
Alternative Fracture Techniques
The first talk I went to was part of the Visual Effects Summit going over alternative fracture techniques using animation in Unreal Engine.
It went over the base creation of the tool. The main four portions of the tool was being able to split up parts of the mesh that will be fractured in different ways,
rotating those pieces around a singular point, rotating them around a local axis, scaling them, and translating them.
Using these four different simple tools and creating some parameters they were able to make some pretty cool products. The main con of this was that if you were doing specific
animations such as opening or closing then it would need to happen in a cinematic. In order to counteract the use of game time they recreated the same effect through the use of particles.
There was some export prep required to start with exporting the expected points of the fractured pieces then moving them to 0,0,0. The other problem solved outside of
not having to use game time is that when using particles is they could now easily be effected by physics.
Procedural Symbiotes
The second talk I went to covered the creation of symbiotes in Marvel's Spiderman 2. The first thing that stood out to me was that they were not able to make it performant
enough to be used outside of cutscenes. The main workflow was moving from Houdini to Maya to create a usable file then to their custom game engine. They were able to cut out the step
of moving to Maya by querying their tools team.
An interesting problem they had to overcome was the enormous file size of the points for the symbiotes. In the original solution they had 70 different scenes and that added up to around 67 GB, which is not something that could be shipped. They ended up switching to a solution that used real time computation and lowered the amount of points stored on disk by around 97%. The computation also still allowed the game to run at 60 fps on console.
UI/UX in 'Star Wars Jedi Survivor'
This talk was the best one I went to on Monday, there was a ton of interesting information about the process of UI creation. The process they used was led
by UX research then the design was createda around that and along with that all the teams were working fairly close together in order to create an efficient
pipeline. I didn't take a lot of notes over this talk, since it is not my specialty, but the main takeaways I had were that once you have a system in place for the UX
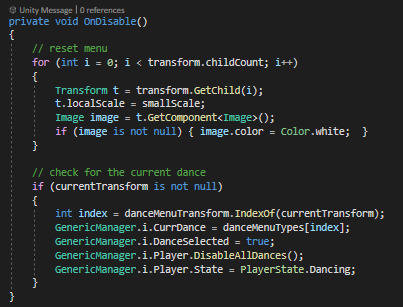
of a game then that should stay the same throughout the game. In the case of Jedi Survivor all the menus had a system where you move along two axis. One of the axis is the
class of the item, for example torso, then the other axis has the options for that class, in this example it would be jackets. By having this same system of moving along two axis to
select cosmetics they were able to make a very usable system that was also visually pleasing.
Tuesday
Water Shaders in Diablo
This talk was really well done and covered a lot of different topics. There was shallow water, deep water, ice, snow, and puddles. If I ever want to make a cool water shader I am definitely
going to go back into the vault to rewatch, since the speaker went over a lot of techniques. There were two parts that stood out to me a lot. The first was that there was a texture for manipulation of the water.
They called it a force texture and it took the positions of enemies, enemy attacks, the player, and player attacks. It would then be used in the shader to manipulate it. Another cool tool was that there was a portion of
the shader that took in the terrain texture, this meant that artists could manipulate the terrain and the water would automatically conform to the new terrain. A place the speaker said could have been more fleshed out
was the bobbing objects. I assume this meant that the process was not very automated for artists to make bobbing objects.
GPU Based Foliage Interaction
This talk was also really well done. There were two speakers, one technical artist and one programmer who worked on optimizations. Similar to the above talk this used a texture to keep track of the positions of the player
and the dinosaurs. It would then take in the foliage assets that were marked and apply a certain amount of force. The foliage assets were prepped in a way that I did not take notes over, but was important. One of the ways was
putting the coordinates of the different bones into a texture so that they could be referenced in the GPU. Overall it was really interesting to see the process of ideating and optimization from the two speakers.
Audio tools
This talk is going over what different audio tools look like and what they do. An audio tool solves an audio production problem, manipulatioes or transforms audio data, offers a game for content creators, empowers creators to realize their visions, and serve the vision of the game.
The main goals of an audio tool is to make it work, understand the users' goals and the job that neeeds to be done. Is there middleware that can be used? One of the good answers to this question is whether the developement team you are working on is able to make impovements upon the middleware you would be buying.
The talker used EAs inhouse engine called Frostbite.
A tool example is "Get Music Info" which gets any information someone would need about music that is running in the game.
Another tool is "Behavioral World Sounds" which allows for dynamic creation of sounds in worlds not directly tied to objects.
Tools beyond games, good tools should outlive game projects. Patterns for building tools. One of the most asked for features is undo and redo. Logging and debugging is also crucial.
Good tools are as good as the support and documentation provided, ideally has low downtime and has minimized mantenance costs. There should be unit testing and manual testing.
Typography
The last talk of the day was pretty fun, it was just going over different forms of typography that are used in the game called Gubbins. The talk was funny and a good way to end the day.
Wednesday
There were some interesting talks on Wednesday, but I am going to focus the rest of the week on what I learned from the roundtables I attended. I attended two roundtables on Wednesday.
The first was a Technical Art round table. It was very well put together and showed to me that technical artists are enjoyable to interact with. We went over a range of topics, but the majority of
the topics could be traced back to the main idea of how to get better feedback on solutions you have created in an online workplace. It seemed to be a large issue getting honest feedback on solutions from
users. The most common solution I noticed was having a power user that you poke repeatedly for feedback.
The second roundtable I went to on Wednesday was a VFX roundtable. There were a lot of similar talking points about how to deal with an online workplace. There were also some student questions asking about
what people are looking for in portfolios. The main feedback was focus in depth on a specific effect and be able to explain your decisions. Another interesting point was being able to adapt your style to the
studio that you were trying to get hired by. I did notice during the roundtable that there was a large variety of working situations for the people there. There were in house VFX teams, single in house VFX leads,
and outsourcing teams. I had an interesting conversation with a lead VFX artist after the roundtable about it.
Thursday
I also attended two roundtables on Thursday. The first one I attended was a tools design roundtable. The main discource of the talk shortly switched to similar topics from the previous day.
Dealing with getting honest feedback in an online workplace. Before that started I did ask a question about how people deal with changes being made to a shipped tool and people asking for those changes
to be merged back into the baseline. It was not talked about for a long time but I got two different answers. One was from a tools lead at Riot who said they take the new tool that was created and allow
people to use it, but then look it over and see what is worth fully developing and streamlining into engine for everyone. The second answer was from a tools lead at World of Warcraft. He said that
they would take the changes that were made, then as the tool owner, if the change was deemed suitable, they would re-write the tool with the idea of that change in mind.
The second roundtable I waent to was the second Technical Art roundtable. The theme of the roundtable was Machine Learning. I found it very interesting to learn about Machine Learning
outside of the presence of "Gen AI". It was also interesting to learn that there were ML tools being worked on by different tech artists in the group before the GPT boom happened.
Most everyone agreed that it was extremely important to vet and verify the data you are using to train a network and run it by the legal team of your studio. There was a guy at bandai namco that
described how he/his team created a ghost mode in a fighting game that is able to learn from the player. The way this worked was by having them opt into having their data tracked when they say they
want to use the ghost mode. This was a great way to use ML and avoid the copyright issues that have been arising. There was one dev that was talking about using ChatGPT to help write code, document code, and
help to write tools. They believed that the only place you had to fear copyright infringement was in the content you ship. I disagree heavily with this take, and I believe from looking at other peoples expressions that they did too,
saying that you shouldn't have to worry about anything you don't ship is akin to saying it should be fine to pirate all the adobe products since you aren't putting code from their software in the game.
I was blocked on the select menu being completed. Worked on bug fix for crystals other than Slash being unable to break crystal deposits.
The theme for this role analysis was doing something you have never done in an engine you are not very familiar with or haven't used. I was very interested in setting up a lobby
system, since I want to work on some small multiplayer games after I graduate. I have used a lot of different game engines from Unity to creating my own render engine in C++/OpenGL
so choosing an engine was difficult. I ended up choosing Unreal Engine 5 because I have only done around four or five projects in Unreal Engine and I have an interest in making more games
in the engine.
I started off the project by using the directly built in listen servers that UE5 comes with and connecting directly via IP. This solution was not viable though, since it required the player
to open up thair command prompt, and type in ipconfig. They would then have to send their IPv4 address to the person who wanted to join their server. This solution is extremely clunky and
does not seem very secure to me.
I ended up switching to using the session nodes that are provided by UE5. They allow for the player to create a session, search for all sessions available, connect to a session, and destroy a session
they are in.
Creating a session makes a new session that is accessible by other players by using the Find Session node. Depending on the amount of sessions you allow the player to find
there will be a max amount of sessions returned. Using the session blueprint type you can join a session. In order to find the correct session you want you could store an index
in the list of sessions or loop through the sessions looking for attributes that follow what you need. The destroy session node destroys the session that you are currently in, removing
it from the available sessions for other players.
In terms of implementation I worked in three blueprints. I worked in the level blueprint and two other blueprints I created specifically. The UMG_Interface blueprint and
the UMG_Button blueprint. Inside the UMG_Interface had the different buttons for connecting, hosting, refreshing, and leaving sessions. I also made a list of UMG_Button widgets
that held the names of the available sessions
For the Host button the logic is as follows. The create session node is the first node that is accessed. After the session is created the base level
is opened. This could be any level you want to open, but for times sake I used the default level provided by UE. The one requirement for this level is that
in the options you must put ?listen. The last two nodes were me updating a local variable and creating a debug log to show when the hosting was successfully completed.
The Leave button is there so that the player is able to destroy their session. Through testing I noticed that the player is unable to host a new
session while they are already in a session. The leave button allows the player to destroy their session and subsequently create a new session.
This first part of the Refresh button is where the sessions are found. If there are no sessions found then the button list will stay cleared
if there is a failure the refresh button will stop with the find sessions node.
After the sessions are found they are put into a for loop. In this for loop the UMG_Button is instantiated for each server found and is put into the
scroll view. The UMG_Button is instantiated with the name of the server for the text of the button, the index that it is being made from, and the parent object.
In this case that is the UMG_Interface, this is needed so the selected server can be updated whenever a UMG_Button is pressed.
Whenever a UMG_Button is pressed it takes the parent set in Init and calls the update index function. This function is to the right. It updates the local
variable storing the selected index or the selected server. It then updates the text in the text box to the right of the server list showing the server information.
It takes the current servers array, which was updated in refresh and gets a reference to a server in that array corresponding to the selected index. It then spits out the
different information that may be useful to the player. In this case I have the server name, player count, max player count, and the ping. This information is then stored
so the player can see information about their selected server
The Connect button takes the previously mentioned selected index and plugs that into the current servers array. It then connects the player to that session.
With a debug log and a state variable update afterwards.
This is a gif of one player pressing the host button, then another player refreshing their list. Once the new server shows up they click it in the server list
and then press connect. After they press connect they are put into the same map as the first player.
For role analysis 2 I think there were a lot of areas I could have expanded upon. It would have bene nice if there were notification for players
when a lobby was destroyed. If there was a way to check ping while in the lobby. See a list of other people in the lobby. Open up the lobbies to
other non-local networks. Have a friends list where you can invite people to your lobby, see invites, or see available lobbies to join.
The original system I had was extremely bare bones. It is the same as old source engine games and I would like to expand it to become more modern.
Throughout my next role analysis I will be adding in the majority of these previously mentioned features. The first two I will add in are the notification
for lobbies being destroyed and a way to check ping in your lobby. I will complete those over the next week.
This week I worked on the final reviews so that we could finish our game and get a final upload to Steam. We currently are only waiting on the last sound branch to be completed, then the game will be fully completed. I reimplemented the Steam Acheivement system which was never merged and a few other bug fixes that were not merged. I also finished review for the settings and the select menu.
This week I got Trevor's enemy branch fully merged into the game. It had 5 new enemy prefabs, animations for the enenmies, and
a couple new scripts. The problem with the merge was that the branch was around a month old, so there were more than 99 conflicts on map1.scene.
Originally I thought that wouldn't be a big deal since I could just take the modified file from main and override the conflicted file.
I tried this route, but there were so many issues with other files that completing a normal merge request was impossible.
The route I ended up going with was copying all the prefabs, animations, and scripts then copying them into main. When branching off of main
there were issues with serialized variables in the UIManager not saving. This meant that I had to work straight off of main. We have had
some issues with serialized objects being lost, but we still haven't figured out why git chooses to cull some but not all.
On the main branch I remade all the pooling functions, added in the correct names for the pooled object enums, replaced all the scripts onto the prefabs,
put the animations in the animation controllers, and finally put the animation controllers onto the prefabs. I also updated the mini boss
to be the new art created by Delilah and animated by Trevor.
After getting the final merge in and testing it out I uploaded it to steam and approved it for the default branch. I also started making a
depot for macOS builds, but ran out of time because of the Little 500 which I raced in this weekend.
Overall it was a very productive week and we are officially done with the game!
I spent this week bug fixing the game, making a build for Noah so he could show off his work to his program, and
remaking my Role Analysis 3 which was lost when my laptop bricked.
Updated Enemy Sizes
Starting the week Delilah noticed that the enemies were not sized correctly and some other bugs like new enemies damaging
while the player was upgrading their crystals. I think the reason the sizing was off from Trevor's original implementation
was because of how much information was lost when trying to merge. Having to replace in all the different scripts on the different
prefabs meant that the serialized values were gone. Delilah and I set up a meeting and updated the sizing of the different enemies
in the process we also noticed one of the enemies was missing so I added that in. Overall it was a productive one hour long meeting,
which helped to put the art in a spot that we are both happy with.
Steam Build Problems
Noah had brought up some game breaking bugs on the Steam build which did not allow them to demo the game to their
class. I was not able to see any of the bugs when I launched the game from Steam so I was not able to help debug easily. Since it is finals
week and I have a lot of projects I am finishing up I was not going to be able to put in enough time to get a good bug fix in and push that
to Steamworks. Instead I pulled main from our repo, created a build, and completed three runs. After the third run I did notice that the Slash
crystal was broken on start, but there were no other major issues. I sent that build to Noah and am waiting to hear back on how the demo went.
Role Analysis Three Progress
My laptop which I created role analysis two on (and did not upload it to source control for some reason) bricked
on April 18th. This meant that I had to remake the second role analysis since I was planning on building off of it
for my third role analysis. Over this past week I remade RA2 on my new computer following the guide I made Role Analysis 2 - Lobbies.
On top of that I made a loading animation, since one of the main features I am adding is the ability to search for a lobby.
I am going to leave the images and explanations of work for the RA3 post, since it is going to be up in the next couple days.
What Is Conquering Ciros
Conquering Ciros is an action rogue like with a dash of strategy. You play as Nilvor, a reborn lich learning
about what happened to his kingdom and his place in this new world. Fight off hordes of enemies while unlocking
new crystals, synergies, and upgrades. Regain what is rightfully yours.
What Worked?
I think there is a short list of things that worked very well for our team. The first thing that in my
opinion that went very well was the tasking of the team. As the Producer/Lead Programmer on the team I was
able to understand the point at which everyone on the team was working. Being a programmer and a producer
allowed my to talk with our team of five programmers and help them when they had issues or give them advice
on parts of the project they could use to their advantage for their issues. Because we had worked together the
previous semester I had a very good idea of the speed at which our sole artist Delilah could work coming into
this semester. This allowed us as a team to figure out early in the semester what art we needed to cut from the
original plan.
Due to the fact that I had set up a good framework for the project the previous semester and was able to communicate
well with the whole team we were able to get an impressive amount of content pushed out by a team of 11 students working
for around 30 weeks.
Outside of my specific contributions to the project I think one of the most important things that worked very well was the
artstyle. Especially with the final animations put in by Trevor the final art by Delilah really pulls together the entire project.
What Didn't Work?
As the producer I think I failed at creating a good system or getting people's ideas into the game. There were some teammates that came
to me with ideas that could be described as "feature creep", I had planned out the entire project with issues and their timings at the
start of the semester. These issues made up the entire semester and to add in new features we would have to cut currently planned ones.
I ended up taking the approach that the morale of the team was more important than the original plan. Especially if there were good
points made about the validity of the current plan and how the new ideas could improve those plans I would take those new ideas and
try to build them into our schedule. The problem that began to occur was that there became a point where there were too many new features
being implemented and that took me completely away from my role as Lead Programmer for a time, making me focus solely on producing.
This was hard for me, since I had created the framework for the game inside Unity by myself. Stepping away from that position for a time
to focus on making life easier for the other programmers on my team hindered some of our productivity.
The most glaring thing that didn't work for our game was our lack of a designer. We had a very basic system for spawning enemies that
did not have very much of an overhaul since the point when it was just Delilah and myself on the team. Because of our lack of a designer
our crystals are not balanced. This means that there are some crystals which feel very good and some that feel bad. If we had had a designer
our game was in a position to be easily balanced in terms of the crystals. I had set up a system with scriptable objects where all the
different crystal abilities were written. The designer could have easily opened the Unity project and updated the balance of the different
crystals in those scriptable objects. Our team just lacked a teammate who was interested/willing to put together a spreadsheet and start
balancing all the different enemies and crystals in the game. In terms of design evolution, that completely stopped after the start of
our senior year. I think this is because Delilah and I stopped putting around 1/3 of our time each towards design. We got our 5 new programmers
and decided it was time to start marching towards game completion.
What I Would Have Improved?
It would have been nice to have gotten the UI art into the game much earlier in production so we could have had a few iterations
and really dialed it down. I think that the first iteration made my Jonah looks good and fits the theme, but there are definitely
areas for improvement and playtesting that UI art could have helped immensely.
As mentioned above in what did not worked I would have tried harder to pick up a designer or transitioned myself into that role and given over
the producer role to someone else on the team. That portion of the game is where Conquering Ciros is lacking the most and an improvement in
that area would make it a great game.
A hindsight is 20/20 moment is that I planned out working on the game until finals week, but we were told in early April that we had around
two weeks to finish up the game. This led us to cutting some features that would have helped fleshed out the game more. If we had known that
the deadline was coming up. We would have cut some other features to help make a more cohesive feel for the game.
Where Could The Game Have Gone?
With a design team and better communication of deadlines Conquering Ciros could have been a great feeling game. At the moment it has
good features made by the programmers on the team, great art made by Delilah, a great suite of sounds and music made by our composer and sound
designer, and a solid narrative made by Juliana. Other than improving the design and balancing of the game if we had more time to work on the
game we would have added specific buffs for each crystal ability, two more levels, two more bosses, crystal ability overhauls, and five more enemies.
Although working on Conquering Ciros for two years was draining at times overall it has been a pleasure. The experience of working from ideating to shipping the
game was invaluable. In terms of my team, working with artists, narrative designers, audio designers, a composer, and different types of programmers was fun and I
learned a lot about working in a team long term.
The theme for this role analysis was networking. As you may notice my previous role analysis was also networking, so I decided
to build off of that implementation. After I had started working I lost all my progress because my laptop bricked. I remade my work
and instead of creating a list of possible servers to join I lowered it to two buttons. A find match button and a create match button.
On top of the new lobby system implementation I decided I wanted to create a loading animation, since it was something I had never done
in Unreal Engine.
Loading Animation Implementation
I first started off with one image, taking that image making copies and offsetting their translation. There were a few issues that came
with this method. The first was that they were not a child of anything, this meant that they were not showing up in the MainMenu widget.
There was also an issue that came with adding all those copies into a list. Whenever I wanted to get an image from the list to manipulate it
if I wanted to keep reference to it I would have to replace that old reference with the copy I had made. Overall this solution with copying an
image that was already in the MainMenu widget was not working.
I eventually moved to creating a seperate widget called LoadingImageWidget. I thought that this would fix the issues from copying something
directly from the MainMenu's canvas, but it did not. You can see that final attempt at the original idea of the implementation below.
I remembered that I had previously added custom widgets as children of other panels in a widget. I continued with that idea. I created a
horizontal box that would hold all my custom loading images and did the following setup that you can see below. I made it so that the
designer for the menus could input a custom amount of images in order to control the length. For every instance of the for loop there are
two images added. One that will have its opacity toggled and one that is just there for spacing.
Below is that actual animation that is occuring. It takes in the global variable called ?loading. This is updated by the different session
nodes when they either finish finding a session or finish creating a session. The macro starts by resetting the loading index to 0, it then
enters a branch checking the previously mentioned variable. If it is loading, then it gets the child of the horizontal box at the current
loading index. This loading index is calculated with modulus so we don't go over the amount of children in the horizontal box if the loading
is taking a long time.
After we get reference to the current child of the horizontal box we make the image clear. We then delay an arbitrary amount and make
the image opaque again. Below you can see the function that allows for this functionality inside of the LoadingImageWidget.
After we toggle the opacity of the image twice we increment the loading index by two. This is so that we skip the image that is being used
for spacing in the horizontal box. Once the loading is completed we loop through all the children of the horizontal box and make them clear.
Below you can see the animation in action. You will continue to see this animation in the future gifs. An artist could easily add
art onto these images which are specific to the game and I could add more life to the animation by adding some noise onto the movement
before the opacity is toggled. This was a fun little project that took a bit of time and had an interesting outcome.
Updating The Lobbies System
The blueprints below are not the original blueprints I had in place for creation of a session, but it is what I ended up with.
It is a macro where the input is the creation of a session. The continuation of that node is setting loading to true, then calling
the setup and the actual animation macros. The setup is just setting the images which are not being used for spacing to be opaque.
There is a delay after both the success and the failure in case they are instantaneous. After the delay for success the arbitrary map
is opened as a ?listen server and loading is reset to false. If the player failed to create a session, then that text will show up on
their screen, then after three seconds it will disappear.
Success is bottom left, fail is bottom right.
The implementation below is before I added in the confirmation widget. I will go over how that
was implemented while showing the implementation of that widget. Below is the first section of
the Find Session macro. It calls the Find Sessions node which looks for all the different servers
which have been created using the sessions backend. It first calls the animation that we went over
previously. After a failure to find any sessions it updates the text on the main menu to say
"Failed to Find Session" and that stays up for 3 seconds. If there were any sessions found then
it updates the text to say Found Session, it then delays an arbitrary amount of time.
After the text is updated the Join Session node is called on the first result of the Find Session
node. It then updates the text on screen to "Joining Session". After a failure it updates the text
to say "Failed to Join Session" which stays on the screen for 3 seconds and updates the loading
variable to false. If the node finishes successfully the text updates to say "Joined Session" for 3 seconds
and the loading variable is updated to false.
Below is a successful joining of a session.
The next thing I added in was a check to see if the player actually wanted to join the session at the time.
I did this through the addition of the Join Confirmation widget. On construct the widget begins a countdown.
When the countdown is finished it calls the failConfirmation function in the MainMenu widget. If the button is
pressed then the succeedConfirmation function is called in the MainMenu widget.
This changes the implementation of the Find Session macro so that it is cut off before the Join Session node.
Where the Join Session node was previously called I added in the instantiation of the new confirmation widget.
That widget was initialized with the countdown length and a reference to the MainMenu. I also set it to be the
child of a horizontal box so that it would show up for the player and they would be able to click the button.
As seen in the three images below the explanation of the new widget, when the user successfully confirms that they
want to join the session that was found there is an event that is called in the MainMenu event graph. This event
calls the new Join Session macro that was created. In the new macro it takes in the variable for the found session
which was stored in the Find Session macro, which is the only real difference.
In the gifs below you can see the difference in flow that is created when the transition from finding a session to
joining a session is moved from being automatic to having a block.
This is a success of the confimration.
This is a failure of the confirmation.
Overall I think that this was a good learning experience. I ended up spending much more time on the interactions between
different widgets than exploring further into network programming. Since I had explored that the previous role analysis I
think that is fine. I can also always revisit networking if I ever feel interested in the topic again. Going through different
ideas in order to create the final loading animation was also very beneficial. Rather than following a tutorial directly it
allowed me to explore what different things Unreal has to offer when creating widgets. In terms of interactions between different
widgets I think I have a long ways to go, but this was a good starting place. In the future I would like to find out the best
way to spawn in new widgets on top of your existing ones. The way I did it with the horizontal box worked, but it came with some
scaling issues.